
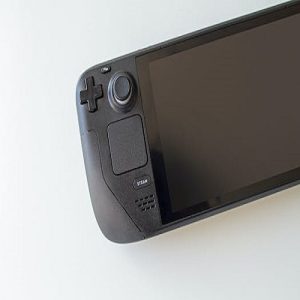
The Steam Deck has taken the gaming world by storm with its powerful hardware and versatility. One of the exciting features of the Steam Deck is its customization options, allowing users to personalize their gaming experience. Among these options is the ability to install custom boot animations, which add a unique touch to the device’s startup process. Steam Deck isn’t another run-of-the-mill portable gaming console. It runs on Steam OS, which is based on Linux. You can change a lot of things about Steam Deck to make it more personal without having to tinker much with the settings.
With the latest update to Steam OS, Valve has made it much easier to use custom boot animations on Steam Deck. If you want to customize Steam Deck on a deeper level, you must first grasp the device. We’ve shown you two simple ways to alter the boot animation of your Steam Deck. In this blog post, we will explore the process of installing custom boot animations on the Steam Deck and discuss the benefits of doing so.
What is Boot Animations?
Before diving into the installation process, let’s understand what boot animations are and why they matter. Boot animations are visual displays that appear when a device powers on. They serve as an engaging and visually pleasing way to signify the device’s startup process. Custom boot animations allow users to replace the default animation with their own creative designs, adding a personal touch to their Steam Deck.
Boot animations can take various forms, including static images, slideshows, or even short video clips. These animations contribute to the overall aesthetic appeal of the device and can reflect the user’s personality or preferences. By installing a custom boot animation, you can make your Steam Deck truly yours.
Preparing for Installation of Custom boot animation
To begin the installation process, it’s essential to ensure that your Steam Deck meets the necessary requirements and that you have the required files. Firstly, check if your Steam Deck model supports custom boot animations and if any specific system requirements need to be met. Refer to the official Steam Deck documentation or the manufacturer’s website for detailed information.
Next, you’ll need to find a suitable custom boot animation. Several websites and online communities offer a wide range of boot animations for various devices, including the Steam Deck. Look for animations that resonate with your style and preferences. Pay attention to the compatibility of the animation with the Steam Deck and choose the appropriate resolution and file format.
Once you have identified the ideal boot animation, download the necessary files to your computer. Typically, boot animations consist of multiple files, including image frames, configuration files, and sometimes additional assets such as sound effects. Ensure that you have all the required files before proceeding to the installation process.
Installation Process
Connecting the Steam Deck to a computer: Use the USB-C cable provided with the Steam Deck to connect it to your computer. Ensure that the Steam Deck is powered on and in the appropriate mode for file transfer.
- Accessing the Steam Deck’s boot animation folder: On your computer, navigate to the Steam Deck’s internal storage. Look for the “BootAnimation” folder or a similar directory.
- Transferring the custom boot animation files to the Steam Deck: Open the folder containing the downloaded boot animation files. Copy the files to the Steam Deck’s boot animation folder. Ensure that the files are organized correctly according to the provided instructions or the animation’s documentation.
- Applying the custom boot animation: Safely disconnect the Steam Deck from your computer. Restart the Steam Deck to initiate the boot animation. The custom boot animation should now be displayed during the startup process.
How to Install Custom Boot Animation on Steam Deck by Using the Desktop Mode
Before we begin, please ensure that you have a good internet connection and a keyboard nearby. To download the boot animation files, you’ll need an Internet connection and a keyboard to type some commands.
- Switch to the “Desktop Mode” on your “Steam Deck“.
- Find a “boot animation” you like. There are lots of “boot animations” you can find online for Steam Deck, both on Reddit and on the “Steam Deck repo website“.
- Either type in “steamdeckrepo.com” into your browser or search for “Steam Deck Repo on Google“.
- Scroll through and find a boot animation you like and click download to save it. You should now have downloaded a .webm file.
- Create your “folders and copy your boot animation“. Follow the steps below.
- Open the file “explorer app” (called Dolphin).
- Check the “Show hidden files” option.
- Navigate to your “home directory” (/home/deck).
- Navigate to .steam/root/config.
- Create a uioverrides folder and enter it.
- Create a movies folder and enter it
- Copy the .webm file you downloaded earlier and put in this folder.
- Make sure it’s called “deck_startup.webm.“
- Restart your Steam Deck.
The boot animation should now be applied when you restart your Steam Deck!
How to Install Custom Boot Animation on Steam Deck by Using the Customization Menu
Check that you have a good internet connection and a keyboard nearby. To download the boot animation files, you’ll need an Internet connection and a keyboard to type some commands. Some of the next steps are variations on the preceding procedure.
- Switch to the “Desktop Mode” on your “Steam Deck“
- Find a “boot animation” that you like. There are lots of boot animations that you can find for Steam Deck online, both on Reddit and on the “Steam Deck repo website“.
- Either type in “steamdeckrepo.com” into your browser or look on “Google for Steam Deck Repo“.
- Scroll through and find a “boot animation” you like and click download to save it. You should now have downloaded a .webm file.
- Create your folders and copy your boot animation. Follow the steps given below.
- Open the “file explorer” app (called Dolphin).
- Enable “Show hidden files“.
- Navigate to your “home directory” (/home/deck).
- Navigate to .steam/root/config.
- Create a “uioverrides folder” and enter it.
- Create a “movies folder” and enter it
- Copy the .webm file you “downloaded earlier” and place it in this folder.
- Make sure the file is named “deck_startup.webm“.
- Once you have them all moved, put your “Steam Deck” back into “Gaming Mode“.
- Once you are back in “gaming mode“, click the “Steam button” to open up the menu.
- Click on “settings“.
- Now go to the settings. Scroll down towards the bottom of the menu and look for “customization“.
- Click on “Customization“
- In the customization menu, you will see all “your movies” at the bottom. If all the movies you downloaded are in the right place, they will show up here.
- Now, just highlight the “movie you want” to use, click on it, and that will now be the movie you see when the machine boots up every time.
You can store as many movies as you want here, so find as many as you want and download them. Any movies purchased through the Steam Points store will also appear here. There’s also a shuffle switch if you want Steam Deck to choose a movie at random every time you turn it on.
Troubleshooting and Tips for Installing Custom Boot Animation on Steam Deck
While installing custom boot animations on the Steam Deck is generally a straightforward process, you may encounter some issues along the way. Here are a few common problems and their possible solutions:
- Compatibility Issues: Ensure that the boot animation you choose is compatible with the Steam Deck’s specifications. Verify the resolution, file format, and any additional requirements specified by the animation’s creator.
- File Format and Size: Double-check that the boot animation files are in the correct format and meet the required dimensions. Improper file formats or oversized files may cause the animation to fail.
- Testing Before Finalizing: It’s always a good idea to test the custom boot animation before finalizing the installation. This allows you to identify any issues and make necessary adjustments. Connect the Steam Deck to your computer and preview the animation to ensure it appears as intended.
Exploring Additional Customization Options for Installing Custom Boot Animation on Steam Deck
Custom boot animations are just the tip of the iceberg when it comes to personalizing your Steam Deck. Here are a few additional customization options you can explore:
- Changing Boot Sounds: In addition to visuals, you can also replace the default boot sound with a custom audio clip. This further enhances the personalization of your Steam Deck and adds an extra layer of uniqueness.
- Customizing the Startup Logo: The startup logo displayed before the boot animation can also be customized. You can replace the default logo with your own design or choose from pre-made alternatives available online.
- Exploring Other Visual Customization Options: Beyond boot animations and startup logos, you can experiment with custom wallpapers, icon packs, and themes to create a visually cohesive and personalized interface.
Conclusion
Customizing your Steam Deck with a unique boot animation adds a personal touch to your gaming experience. By following the installation process outlined in this blog post, you can replace the default animation with one that reflects your style and preferences. Remember to consider compatibility, file formats, and size requirements when selecting a boot animation. Additionally, don’t hesitate to explore other customization options such as boot sounds, startup logos, and visual themes to create a truly personalized Steam Deck. Embrace the opportunity to make your gaming device a reflection of your individuality and enhance your overall enjoyment.
Leave a Reply